In Development
Automating OG Images in Next.js
There is a specific kind of dissapointment when you share a link and it shows up as a blank gray box–no image, no context, just a bare URL. I have been there more times than I’d like to admit.
Back in 2020, I was excited I found a tutorial that we can set a “social preview image” to our website. So I was determined to try it. For every blog post I published, I’d manually design a social preview image in Figma. Copy the title over, pick a layout that felt right for the article, tweak the spacing, export it, compress it, and eventually upload it. It was actually kind of fun at first.
But fun things stop being fun when they’re repetitive. After a while, the ritual became a chore, and the chore became a reason to procrastinate publishing. Eventually I just… stopped doing it entirely.

I tried fixing this during my Gatsby.js era with dynamic image API, the result is great, but there is a lot of code acrobat here and there, and the visual never match what I had in mind at that time. Fast forward to now—my site runs on Next.js, all my post data (title, data, reading time, and cover) already lives in Sanity CMS, and next/og has matured enough to finally do this properly.
So here we are.
Step 1: Design the Template First
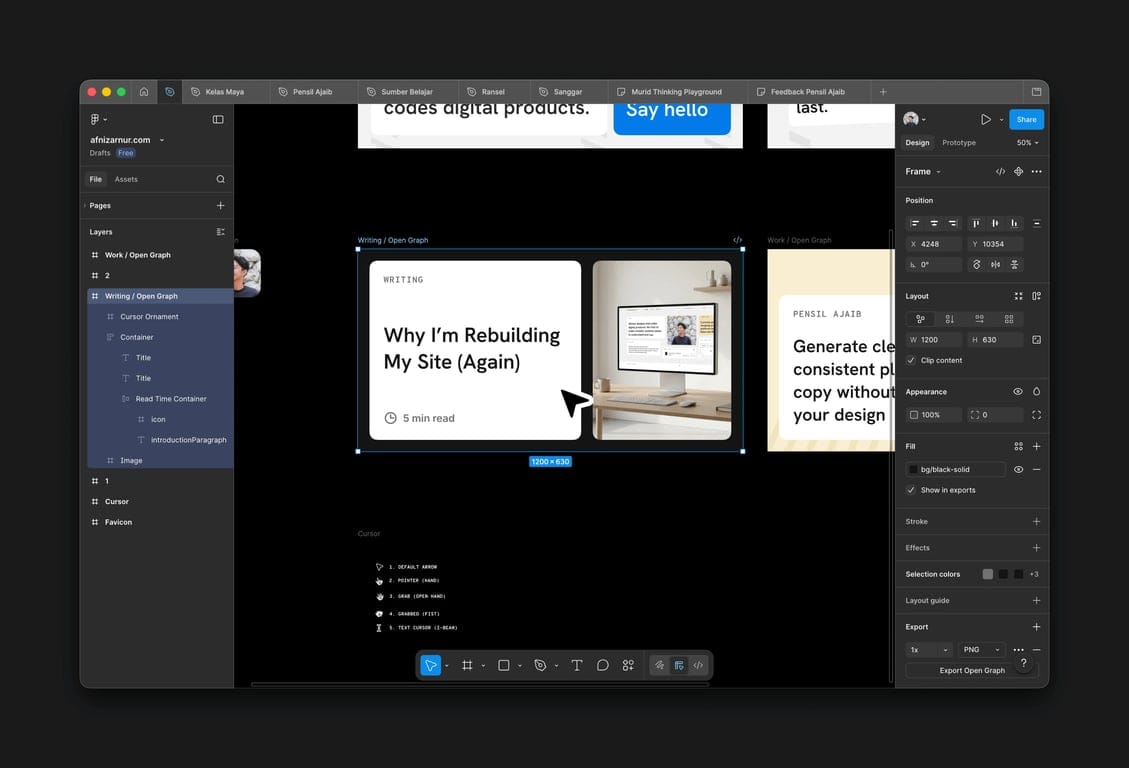
I always start in Figma before writing a single line of code. This keeps the design decisions on the canvas, not buried inside the JSX.
The frame is 1200×630px, which is the standard OG image size. The layout I landed on is deliberately simple: a solid background that matches my site's color palette, left part is the article data with title, date, and reading time, and the right part is article cover. Nothing fancy, but it looks intentional and on-brand of myself.
One constraint worth knowing before you design: next/og uses Satori under the hood, and Satori only supports flexbox. No CSS Grid, no stacking tricks that too much.
Once the frame looks right, I use it as direct visual reference that I will use by converting it to code using Figma MCP (we’ll talk it in another time).
Step 2: Create the Route Handler
Create a file at app/api/og/writing/route.tsx. This becomes the endpoint that generates your OG image on demand—you'll call it with a ?title= query param and get back a PNG.
One thing I learned the hard way: don't fetch your fonts from a URL at render time. It's unreliable and adds latency. Instead, keep your font files in /public/fonts and read them synchronously from the filesystem.
import { ImageResponse } from 'next/og';
import fs from 'node:fs';
import path from 'node:path';

export const runtime = 'nodejs';

export async function GET(req: Request) {
  const { searchParams } = new URL(req.url);
  const title = searchParams.get('title') || 'Untitled';

  const fontData = fs.readFileSync(
    path.join(process.cwd(), 'public/fonts/my-font.ttf')
  );

  return new ImageResponse(
    (
      <div
        style={{
          height: '100%',
          width: '100%',
          display: 'flex',
          flexDirection: 'column',
          backgroundColor: '#0f0f0f',
          padding: '80px',
        }}
      >
        <h1
          style={{
            fontSize: '64px',
            fontWeight: 'bold',
            color: '#ffffff',
            lineHeight: 1.2,
          }}
        >
          {title}
        </h1>
      </div>
    ),
    {
      width: 1200,
      height: 630,
      fonts: [{ name: 'MyFont', data: fontData, style: 'normal' }],
    }
  );
}
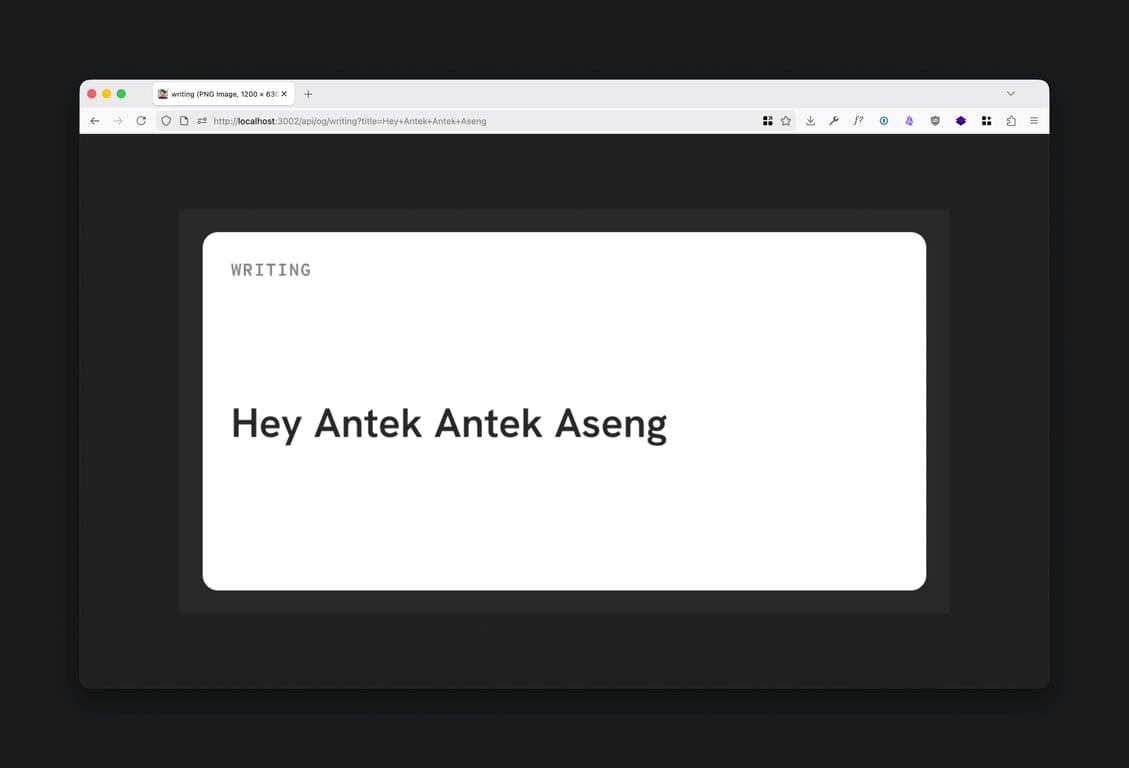
Once this is in place, you can preview it live in your browser by visiting /api/og/writing?title=Hello+World. It's oddly satisfying when the image first renders correctly.
Step 3: Cache the Output
Right now, the image regenerates fresh on every single request. That’s unnecessary and wasteful, the OG image for a post super rarely changes. Adding Cache-Control header tells CDNs to cache the result indefinitely after the first generation.
{
  width: 1200,
  height: 630,
  fonts: [...],
  headers: {
    'Cache-Control': 'public, immutable, no-transform, max-age=31536000',
  },
}
This means the first visitor to share a post pays the small generation cost. Everyone after that gets the cached version instantly.
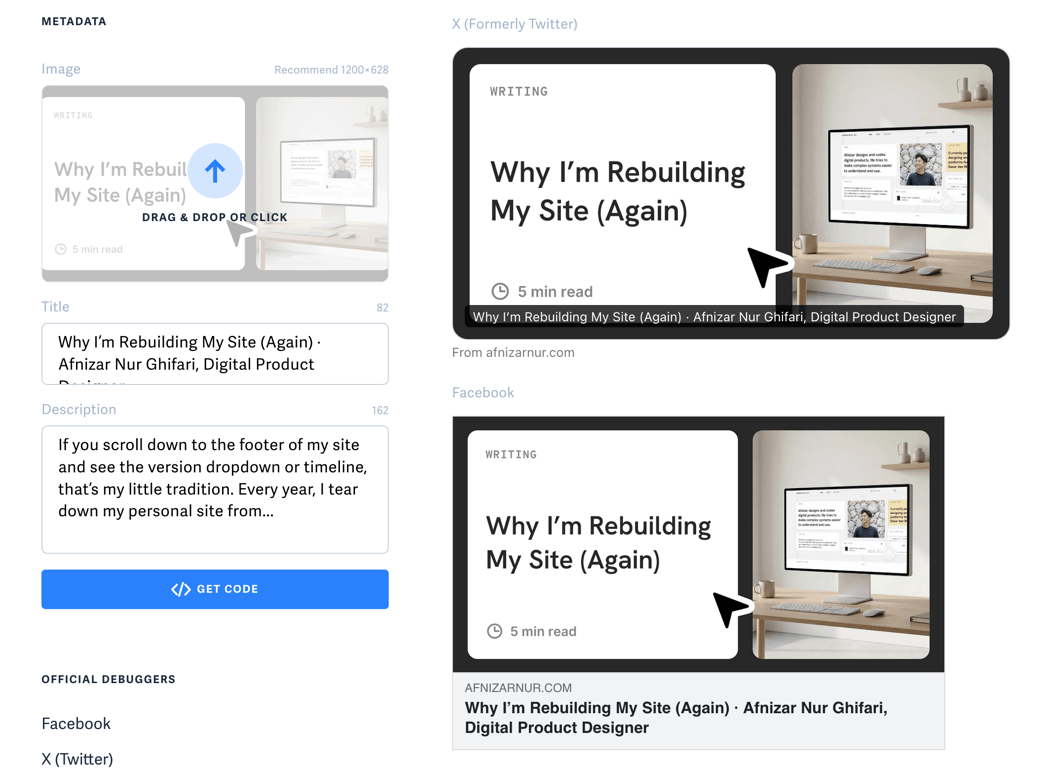
Step 4: Connect It to Your Post Metadata
The last piece is wiring this into generateMetadata on your blog post page. My setup has a nice fallback: if I have manually uploaded a cover image in Sanity for a post, it uses that. Otherwise, it falls back to the auto-generated OG route.
export async function generateMetadata({ params }) {
  const post = await getPost(params.slug);
  const ogUrl = new URL('https://yoursite.com/api/og/writing');
  ogUrl.searchParams.set('title', post.title);

  return {
    openGraph: {
      images: [post.coverImage ?? ogUrl.toString()],
    },
  };
}
This fallback matters to me. It means I still have the option to craft a custom image for posts I care about, without being forced to do it every single time.
A Few Things That Will Trip You Up
I don't want to oversell how smooth this is. Satori has real quirks, and a couple of them took me longer than I'd like to admit to figure out:
- Flexbox only. Grid doesn't work. Any Figma layout using overlapping layers or absolute positioning needs to be restructured before you touch the code.
- Long titles are the hardest part. A short title looks great. A 90-character title will overflow and destroy your layout. Use
WebkitLineClampto cap it at 3–4 lines and addoverflow: hiddento contain it. - Fonts are buffers, not URLs. Satori needs the raw font data.
fs.readFileSyncfrom/publicis the cleanest approach on the Node.js runtime; just don't forget to setexport const runtime = 'nodejs'at the top of the file.
The whole thing took me an afternoon to set up. Now every post I publish automatically gets a clean, on-brand preview image without me touching Figma once.
It's one less reason to delay hitting publish and honestly, that was the whole point from the beginning.
Read next
In Development
Fixing OpenRouter Latency with Cloudflare Worker Region Pinning
Welcome in another technical note where I write my problem of doing things, and write the solution to capture the trail! So basically, I ran into an issue when...
In Development
Flexbox Bukan Jawaban untuk Semua Masalah Layout
Satu dua keluarga kodok, tiap hari bikin layout pakai Flexbox Semenjak Flexbox hadir di tahun 2015, layouting menggunakan CSS semakin dipermudah. Penggunaan...